
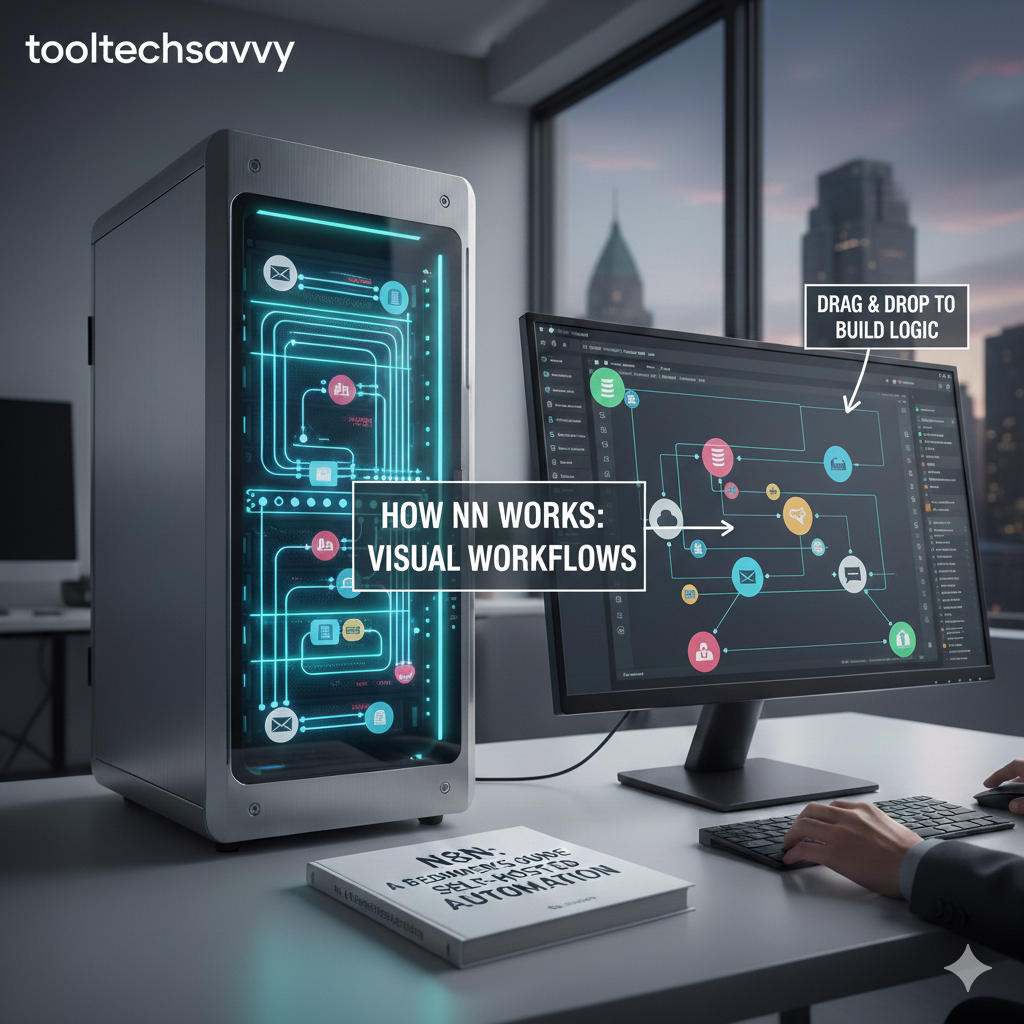
Understanding how n8n workflows operate is the key to unlocking the full potential of this powerful automation platform. While the concept of “connecting apps together” sounds simple, the underlying mechanics of how data flows, transforms, and triggers actions can seem mysterious to newcomers.
In this comprehensive visual guide, we’ll demystify n8n workflows by breaking down every component, showing you exactly how data moves through your automations, and providing clear visual examples that make even complex concepts easy to grasp.
Whether you’re just starting with n8n or looking to deepen your understanding to build more sophisticated automations, this visual walkthrough will give you the mental models you need to think like an automation expert.
The Fundamental Concept: Nodes and Connections
At its core, every n8n workflow is built on two primary elements:
Nodes
Think of nodes as individual workers on an assembly line. Each node has a specific job to do—whether that’s watching for new emails, sending a Slack message, transforming data, or making a decision based on certain conditions.
Visual Representation:
┌─────────────────┐
│   Gmail Trigger │  ← A node that watches for new emails
└─────────────────┘

┌─────────────────┐
│  Slack Message  │  ← A node that sends messages to Slack
└─────────────────┘

┌─────────────────┐
│   IF Condition  │  ← A node that makes decisions
└─────────────────┘
Connections
Connections are the conveyor belts between workers. They determine how data flows from one node to the next, creating the sequence of operations that make up your automation.
Visual Representation:
┌─────────────┐      ┌─────────────┐      ┌─────────────┐
│   Node A    │ ───> │   Node B    │ ───> │   Node C    │
└─────────────┘      └─────────────┘      └─────────────┘
     Data              Data flows           Data arrives
   starts here         through here         at destination
Anatomy of a Complete Workflow
Let’s visualize a complete workflow with all its components labeled:
WORKFLOW: "New Customer Welcome Automation"

┌──────────────────────────────────────────────────────────────┐
│                                                              │
│  1. TRIGGER NODE (Starts the workflow)                      │
│  ┌─────────────────────────────────┐                        │
│  │  Webhook: New Customer Signup   │                        │
│  │  Listens for: POST requests     │                        │
│  └────────────┬────────────────────┘                        │
│               │                                              │
│               │ Data: {name, email, plan}                    │
│               ▼                                              │
│  2. ACTION NODE (Does something with the data)               │
│  ┌─────────────────────────────────┐                        │
│  │  Google Sheets: Add Row         │                        │
│  │  Action: Creates new customer   │                        │
│  └────────────┬────────────────────┘                        │
│               │                                              │
│               │ Data: {name, email, plan, timestamp}         │
│               ▼                                              │
│  3. LOGIC NODE (Makes decisions)                             │
│  ┌─────────────────────────────────┐                        │
│  │  IF: Check Plan Type            │                        │
│  │  Condition: plan === "premium"  │                        │
│  └───────┬─────────────┬───────────┘                        │
│          │             │                                     │
│    TRUE  │             │  FALSE                              │
│          ▼             ▼                                     │
│  ┌──────────────┐  ┌──────────────┐                        │
│  │ Send Premium │  │ Send Standard│                        │
│  │ Welcome Email│  │ Welcome Email│                        │
│  └──────────────┘  └──────────────┘                        │
│                                                              │
└──────────────────────────────────────────────────────────────┘
The Four Types of Nodes Explained Visually
1. Trigger Nodes (Workflow Starters)
Trigger nodes are the ignition switch for your workflows. They sit at the beginning and watch for specific events to occur.
Visual Concept:
🔍 WATCHING...
┌─────────────────────────────────┐
│   Trigger: Gmail                │
│   Waiting for: New email        │
│   ⏱️  Checking every: 5 minutes  │
└─────────────────────────────────┘
         │
         │ ⚡ NEW EMAIL DETECTED!
         ▼
    Workflow begins...
Common Trigger Types:
SCHEDULE TRIGGER          WEBHOOK TRIGGER           APP TRIGGER
     ⏰                        🌐                       📧
Every day at 9am          When URL receives         When new email
     │                      POST request                 arrives
     ▼                          │                         │
Start workflow            Start workflow            Start workflow
2. Action Nodes (Task Performers)
Action nodes perform operations—they create, update, delete, or send data to external services.
Visual Flow:
INPUT DATA                ACTION NODE               OUTPUT DATA
    │                         │                         │
    ▼                         ▼                         ▼
{                    ┌─────────────────┐         {
  "email": "...",    │  Slack: Send    │           "message_id": "...",
  "name": "..."      │  Message        │           "timestamp": "...",
}                    └─────────────────┘           "success": true
                           │                       }
                     Performs action
                     Sends to Slack
Multiple Actions in Sequence:
Data → [Create Record] → [Send Email] → [Update Status] → [Log Event]
         Database          SMTP           CRM              Analytics
3. Logic Nodes (Decision Makers)
Logic nodes add intelligence to your workflows, allowing different paths based on conditions.
IF Node Visualization:
                    ┌─────────────────┐
    Data arrives → │  IF Node        │
                    │  Check: amount  │
                    │  Condition: >100│
                    └────────┬────────┘
                             │
                    ┌────────┴────────┐
                    │                 │
                 TRUE               FALSE
                    │                 │
                    ▼                 ▼
         ┌──────────────────┐  ┌──────────────┐
         │ High Value Path  │  │ Normal Path  │
         │ • Alert Manager  │  │ • Auto-reply │
         │ • Priority Flag  │  │ • Standard   │
         └──────────────────┘  └──────────────┘
SWITCH Node Visualization:
                    ┌─────────────────┐
    Data arrives → │  SWITCH Node    │
                    │  Route by:      │
                    │  customer.tier  │
                    └────────┬────────┘
                             │
              ┌──────────────┼──────────────┐
              │              │              │
           "Free"        "Pro"         "Enterprise"
              │              │              │
              ▼              ▼              ▼
         [Basic]        [Enhanced]     [Premium]
         [Support]      [Support]      [Support]
4. Transform Nodes (Data Manipulators)
Transform nodes reshape, filter, and modify data as it flows through your workflow.
SET Node (Data Transformation):
INPUT DATA                  SET NODE                 OUTPUT DATA
    │                          │                         │
    ▼                          ▼                         ▼
{                      ┌──────────────┐            {
  "first": "John",     │ Combine &    │              "fullName": "John Doe",
  "last": "Doe",       │ Transform    │              "email": "john@...",
  "email": "john@.."   │ Fields       │              "status": "active"
}                      └──────────────┘            }
                             │
                       Removes old fields
                       Creates new fields
                       Formats data
FUNCTION Node (JavaScript Processing):
┌─────────────────────────────────────────────────────┐
│  Function Node: Custom JavaScript                   │
│                                                      │
│  const items = $input.all();                        │
│  return items.map(item => ({                        │
│    ...item.json,                                    │
│    processed: true,                                 │
│    timestamp: new Date().toISOString()              │
│  }));                                               │
│                                                      │
│  Input: 5 items → Processing → Output: 5 items      │
│  (enriched with new fields)                         │
└─────────────────────────────────────────────────────┘
How Data Flows Through Workflows
Understanding data flow is crucial. Let’s visualize how data transforms as it moves through nodes.
Single Item Flow
STEP 1: Trigger receives data
┌──────────────────────┐
│ Webhook Trigger      │
│ Receives:            │
│ {                    │
│   "name": "Alice",   │
│   "email": "a@.com"  │
│ }                    │
└──────┬───────────────┘
       │
       │ Item 0: {name: "Alice", email: "a@.com"}
       ▼
STEP 2: Transform data
┌──────────────────────┐
│ Set Node             │
│ Adds fields:         │
│ • timestamp          │
│ • status: "new"      │
└──────┬───────────────┘
       │
       │ Item 0: {name: "Alice", email: "a@.com",
       │          timestamp: "2026-02-10", status: "new"}
       ▼
STEP 3: Store data
┌──────────────────────┐
│ Google Sheets        │
│ Action: Append row   │
└──────────────────────┘
Multiple Items Flow
STEP 1: Get multiple records
┌──────────────────────────┐
│ Airtable: Get Records    │
│ Returns 3 records:       │
│ Item 0: {id: 1, ...}     │
│ Item 1: {id: 2, ...}     │
│ Item 2: {id: 3, ...}     │
└──────┬───────────────────┘
       │
       │ 3 items flowing together
       ▼
STEP 2: Process each item
┌──────────────────────────┐
│ Function Node            │
│ Processes:               │
│ Item 0 → Transform       │
│ Item 1 → Transform       │
│ Item 2 → Transform       │
└──────┬───────────────────┘
       │
       │ 3 items (transformed)
       ▼
STEP 3: Send individually
┌──────────────────────────┐
│ Slack: Send Message      │
│ Sends:                   │
│ • Message for Item 0     │
│ • Message for Item 1     │
│ • Message for Item 2     │
└──────────────────────────┘

Result: 3 separate Slack messages sent
Common Workflow Patterns Visualized
Pattern 1: Linear Workflow (Simple Chain)
The most basic pattern—data flows in a straight line.
[Trigger] → [Action 1] → [Action 2] → [Action 3] → [End]

EXAMPLE: Email to Database
┌──────────┐   ┌──────────┐   ┌──────────┐   ┌──────────┐
│  Gmail   │→→→│ Extract  │→→→│ Database │→→→│ Confirm  │
│ Trigger  │   │  Data    │   │  Insert  │   │  Email   │
└──────────┘   └──────────┘   └──────────┘   └──────────┘
Pattern 2: Conditional Branching
Data takes different paths based on conditions.
                     ┌──────────┐
                     │ Trigger  │
                     └────┬─────┘
                          │
                          ▼
                     ┌──────────┐
                     │ IF Node  │
                     └────┬─────┘
                          │
              ┌───────────┴───────────┐
              │                       │
           TRUE                     FALSE
              │                       │
              ▼                       ▼
       ┌─────────────┐         ┌─────────────┐
       │ Action A    │         │ Action B    │
       └─────────────┘         └─────────────┘

EXAMPLE: Order Processing
                     ┌──────────────┐
                     │ New Order    │
                     └──────┬───────┘
                            │
                            ▼
                     ┌──────────────┐
                     │ IF: Amount   │
                     │ > $1000?     │
                     └──────┬───────┘
                            │
              ┌─────────────┴─────────────┐
              │                           │
            YES                          NO
              │                           │
              ▼                           ▼
       ┌────────────────┐         ┌────────────┐
       │ Alert Manager  │         │ Auto-      │
       │ Request Review │         │ Approve    │
       └────────────────┘         └────────────┘
Pattern 3: Parallel Processing
Multiple actions happen simultaneously.
                     ┌──────────┐
                     │ Trigger  │
                     └────┬─────┘
                          │
              ┌───────────┼───────────┐
              │           │           │
              ▼           ▼           ▼
       ┌──────────┐ ┌──────────┐ ┌──────────┐
       │ Action A │ │ Action B │ │ Action C │
       └──────────┘ └──────────┘ └──────────┘

EXAMPLE: Multi-Channel Notification
                     ┌──────────────┐
                     │ New Support  │
                     │ Ticket       │
                     └──────┬───────┘
                            │
              ┌─────────────┼─────────────┐
              │             │             │
              ▼             ▼             ▼
       ┌───────────┐ ┌───────────┐ ┌───────────┐
       │ Send      │ │ Create    │ │ Add to    │
       │ Email     │ │ Slack     │ │ Database  │
       │ Alert     │ │ Message   │ │           │
       └───────────┘ └───────────┘ └───────────┘
Pattern 4: Merge and Combine
Multiple data sources come together.
┌──────────┐         ┌──────────┐
│ Source A │────┐    │ Source B │
└──────────┘    │    └──────────┘
                │         │
                ▼         ▼
                ┌──────────┐
                │  MERGE   │
                │  Node    │
                └────┬─────┘
                     │
                     ▼
                ┌──────────┐
                │ Process  │
                │ Combined │
                └──────────┘

EXAMPLE: Customer 360 View
┌──────────────┐         ┌──────────────┐
│ CRM Data     │────┐    │ Support Data │
└──────────────┘    │    └──────────────┘
                    │         │
┌──────────────┐    │         │    ┌──────────────┐
│ Purchase     │────┤         │    │ Social Media │
│ History      │    │         │    │ Activity     │
└──────────────┘    │         │    └──────┬───────┘
                    │         │           │
                    ▼         ▼           ▼
                    ┌────────────────────┐
                    │ MERGE ALL SOURCES  │
                    └──────────┬─────────┘
                               │
                               ▼
                    ┌────────────────────┐
                    │ Create Complete    │
                    │ Customer Profile   │
                    └────────────────────┘
Pattern 5: Loop/Iteration
Process items one by one with detailed control.
┌──────────────┐
│ Get List of  │
│ Items        │
└──────┬───────┘
       │
       ▼
┌──────────────┐
│ Split Out    │◄─────┐
│ Each Item    │      │
└──────┬───────┘      │
       │              │
       ▼              │
┌──────────────┐      │
│ Process      │      │
│ Single Item  │      │
└──────┬───────┘      │
       │              │
       ▼              │
┌──────────────┐      │
│ More Items?  │──YES─┘
└──────┬───────┘
       │
      NO
       │
       ▼
┌──────────────┐
│ All Done!    │
└──────────────┘

EXAMPLE: Bulk Email Sender
┌──────────────────┐
│ Get Customer List│
│ (100 customers)  │
└────────┬─────────┘
         │
         ▼
┌──────────────────┐
│ For Each         │◄────────┐
│ Customer         │         │
└────────┬─────────┘         │
         │                   │
         ▼                   │
┌──────────────────┐         │
│ Personalize      │         │
│ Email Template   │         │
└────────┬─────────┘         │
         │                   │
         ▼                   │
┌──────────────────┐         │
│ Send Email       │         │
└────────┬─────────┘         │
         │                   │
         ▼                   │
┌──────────────────┐         │
│ Wait 5 seconds   │         │
└────────┬─────────┘         │
         │                   │
         ▼                   │
┌──────────────────┐         │
│ More customers?  │─YES─────┘
└────────┬─────────┘
         │
        NO
         │
         ▼
┌──────────────────┐
│ Log: 100 emails  │
│ sent successfully│
└──────────────────┘
Data Transformation in Action
Let’s visualize how data actually transforms as it moves through nodes.
Example: Customer Onboarding Workflow
INITIAL DATA (from web form):
{
  "firstName": "Sarah",
  "lastName": "Johnson",
  "email": "sarah.j@email.com",
  "company": "TechCorp",
  "employees": "50-100"
}
                 │
                 ▼
┌────────────────────────────────────────┐
│ NODE 1: SET - Format Data              │
│ • Combine names                        │
│ • Standardize company size             │
└────────────────┬───────────────────────┘
                 │
                 ▼
TRANSFORMED DATA:
{
  "fullName": "Sarah Johnson",
  "email": "sarah.j@email.com",
  "company": "TechCorp",
  "companySize": "medium",
  "tier": null
}
                 │
                 ▼
┌────────────────────────────────────────┐
│ NODE 2: IF - Determine Tier            │
│ If companySize === "medium"            │
│ Then tier = "professional"             │
└────────────────┬───────────────────────┘
                 │
                 ▼
ENRICHED DATA:
{
  "fullName": "Sarah Johnson",
  "email": "sarah.j@email.com",
  "company": "TechCorp",
  "companySize": "medium",
  "tier": "professional"
}
                 │
                 ▼
┌────────────────────────────────────────┐
│ NODE 3: Function - Add Metadata        │
│ JavaScript adds timestamp & ID         │
└────────────────┬───────────────────────┘
                 │
                 ▼
FINAL DATA:
{
  "id": "CUST-2026-001234",
  "fullName": "Sarah Johnson",
  "email": "sarah.j@email.com",
  "company": "TechCorp",
  "companySize": "medium",
  "tier": "professional",
  "createdAt": "2026-02-10T14:30:00Z",
  "status": "active"
}
                 │
                 ▼
┌────────────────────────────────────────┐
│ NODE 4: Airtable - Create Record       │
│ Stores customer in database            │
└────────────────────────────────────────┘
Error Handling Visualized
Understanding how errors are caught and handled is crucial for reliable workflows.
Basic Error Handling
┌──────────────┐
│ Normal Flow  │
└──────┬───────┘
       │
       ▼
┌──────────────┐
│ Action Node  │──── ❌ ERROR!
└──────┬───────┘           │
       │                   │
    SUCCESS                │
       │                   ▼
       │          ┌──────────────────┐
       │          │ Error Trigger    │
       │          │ (catches error)  │
       │          └────────┬─────────┘
       │                   │
       │                   ▼
       │          ┌──────────────────┐
       │          │ Send Error       │
       │          │ Notification     │
       │          └──────────────────┘
       │
       ▼
┌──────────────┐
│ Continue...  │
└──────────────┘
Try-Catch Pattern
┌─────────────────────────────────────────┐
│ TRY Block                               │
│                                         │
│  ┌──────────┐    ┌──────────┐         │
│  │ Risky    │ →  │ Risky    │         │──✓ Success
│  │ Action 1 │    │ Action 2 │         │    │
│  └──────────┘    └──────────┘         │    │
│                                         │    ▼
└─────────────────────────────────────────┘  Continue
           │                                  Normal
        ❌ Error                              Flow
           │
           ▼
┌─────────────────────────────────────────┐
│ CATCH Block                             │
│                                         │
│  ┌──────────┐    ┌──────────┐         │
│  │ Log      │ →  │ Send     │         │
│  │ Error    │    │ Alert    │         │
│  └──────────┘    └──────────┘         │
│                                         │
└─────────────────────────────────────────┘
           │
           ▼
       Workflow
       Continues
Execution Flow: What Happens When You Click “Execute”
Let’s visualize what happens inside n8n when you run a workflow:
USER CLICKS "EXECUTE WORKFLOW"
           │
           ▼
┌──────────────────────────────────────┐
│ 1. n8n Engine Starts                 │
│    • Creates execution ID            │
│    • Prepares execution context      │
└────────────┬─────────────────────────┘
             │
             ▼
┌──────────────────────────────────────┐
│ 2. Trigger Node Executes             │
│    • Fetches/waits for data          │
│    • Returns initial items           │
│    Items: [Item0]                    │
└────────────┬─────────────────────────┘
             │
             ▼
┌──────────────────────────────────────┐
│ 3. Node A Receives Data              │
│    Input: [Item0]                    │
│    • Processes each item             │
│    • Calls external API if needed    │
│    Output: [Item0-modified]          │
└────────────┬─────────────────────────┘
             │
             ▼
┌──────────────────────────────────────┐
│ 4. Node B Receives Data              │
│    Input: [Item0-modified]           │
│    • Continues processing            │
│    Output: [Item0-final]             │
└────────────┬─────────────────────────┘
             │
             ▼
┌──────────────────────────────────────┐
│ 5. Workflow Completes                │
│    • Saves execution history         │
│    • Returns success/failure status  │
│    • Shows final output              │
└──────────────────────────────────────┘
           │
           ▼
    USER SEES RESULTS
    ✅ Success: 1 item processed
Real-World Workflow Example: E-commerce Order Processing
Let’s put it all together with a complete, real-world example:
═══════════════════════════════════════════════════════════════
                    ORDER PROCESSING WORKFLOW
═══════════════════════════════════════════════════════════════

1. TRIGGER: Webhook receives new order
   ┌──────────────────────────────────────┐
   │ Webhook: "/new-order"                │
   │ Data received:                       │
   │ {                                    │
   │   orderId: "ORD-12345",              │
   │   customer: "john@email.com",        │
   │   items: [...],                      │
   │   total: 299.99,                     │
   │   paymentStatus: "paid"              │
   │ }                                    │
   └────────────┬─────────────────────────┘
                │
                ▼
2. VALIDATE ORDER
   ┌──────────────────────────────────────┐
   │ IF: Payment Status = "paid"?         │
   └────────┬──────────────────┬──────────┘
            │                  │
          YES                 NO
            │                  │
            │                  ▼
            │         ┌────────────────────┐
            │         │ Send Payment       │
            │         │ Reminder Email     │
            │         └────────────────────┘
            │                  │
            │                  ▼
            │              [END]
            │
            ▼
3. PARALLEL ACTIONS (All happen simultaneously)
   ┌──────────────┬──────────────┬──────────────┐
   │              │              │              │
   ▼              ▼              ▼              ▼
┌────────┐  ┌────────┐  ┌────────┐  ┌────────┐
│ Add to │  │ Send   │  │ Create │  │ Notify │
│ Google │  │ Confirm│  │ Asana  │  │ Slack  │
│ Sheets │  │ Email  │  │ Task   │  │ Team   │
└───┬────┘  └───┬────┘  └───┬────┘  └───┬────┘
    │           │           │           │
    └───────────┴───────────┴───────────┘
                │
                ▼
4. CHECK INVENTORY
   ┌──────────────────────────────────────┐
   │ Airtable: Get Stock Levels           │
   └────────────┬─────────────────────────┘
                │
                ▼
   ┌──────────────────────────────────────┐
   │ IF: Stock Available?                 │
   └────────┬──────────────────┬──────────┘
            │                  │
          YES                 NO
            │                  │
            ▼                  ▼
   ┌────────────────┐  ┌────────────────┐
   │ Ship Order     │  │ Backorder      │
   │ • Print Label  │  │ • Notify       │
   │ • Update Track │  │ • Set ETA      │
   └────────────────┘  └────────────────┘
            │                  │
            └──────────┬───────┘
                       │
                       ▼
5. FINAL ACTIONS
   ┌──────────────────────────────────────┐
   │ Update CRM with Order Status         │
   └────────────┬─────────────────────────┘
                │
                ▼
   ┌──────────────────────────────────────┐
   │ Log Event to Analytics               │
   └────────────┬─────────────────────────┘
                │
                ▼
             [END]
   ┌──────────────────────────────────────┐
   │ ✅ Order Processed Successfully       │
   │ Total Time: ~5 seconds               │
   │ Manual Time Saved: ~15 minutes       │
   └──────────────────────────────────────┘
Understanding Execution Modes
n8n offers different execution modes that affect how your workflow runs:
Manual Execution (Testing)
┌──────────────────────────────────────────────┐
│ YOU CLICK "EXECUTE WORKFLOW"                 │
│                                              │
│ • Runs immediately                           │
│ • Uses test data                             │
│ • Shows detailed output for each node        │
│ • Useful for debugging                       │
│                                              │
│ Status: Manual Test ✋                       │
└──────────────────────────────────────────────┘
Active Execution (Production)
┌──────────────────────────────────────────────┐
│ WORKFLOW TOGGLE: ON ⚡                       │
│                                              │
│ • Runs automatically when triggered          │
│ • Operates in background                     │
│ • Saves execution history                    │
│ • Production mode                            │
│                                              │
│ Status: Active & Waiting... 👀               │
└──────────────────────────────────────────────┘
Debugging Workflows: Visual Troubleshooting
When something goes wrong, here’s how to visualize the problem:
PROBLEM: Workflow fails at Node 3

VIEW 1: Execution Overview
┌────┐    ┌────┐    ┌────┐    ┌────┐    ┌────┐
│ ✅ │ →  │ ✅ │ →  │ ❌ │ →  │ ⚪ │ →  │ ⚪ │
└────┘    └────┘    └────┘    └────┘    └────┘
Node1    Node2    Node3    Node4    Node5
                    ↑
                  Failed!

VIEW 2: Click on Failed Node
┌─────────────────────────────────────────┐
│ Node 3: Send Email                      │
│                                         │
│ INPUT DATA: ✅                          │
│ {                                       │
│   "to": "user@email.com",               │
│   "subject": "Hello",                   │
│   "body": "..."                         │
│ }                                       │
│                                         │
│ ERROR: ❌                               │
│ "Invalid credentials for SMTP server"   │
│                                         │
│ SOLUTION:                               │
│ → Check email credentials               │
│ → Verify SMTP settings                  │
└─────────────────────────────────────────┘
Performance Optimization Visualized
Before Optimization (Slow)
Sequential Processing: 1 item at a time
┌────┐  wait  ┌────┐  wait  ┌────┐  wait  ┌────┐
│ A  │ ───→   │ B  │ ───→   │ C  │ ───→   │ D  │
└────┘        └────┘        └────┘        └────┘
  1s    1s      1s    1s      1s    1s      1s

Total Time: 7 seconds for 1 item
For 100 items: 700 seconds (11+ minutes)
After Optimization (Fast)
Batch Processing: Multiple items together
┌────────────────────────────────────┐
│ Process 10 items simultaneously    │
│ ┌──┐ ┌──┐ ┌──┐ ┌──┐ ┌──┐          │
│ │A1│ │A2│ │A3│ │A4│ │A5│ ...      │
│ └──┘ └──┘ └──┘ └──┘ └──┘          │
└────────────────────────────────────┘
        All complete in 1s

Total Time: 1 second for 10 items
For 100 items: 10 seconds (10x batches)

Result: 70x faster! 🚀
Advanced Patterns: Sub-Workflows
Sub-workflows allow you to create reusable components:
MAIN WORKFLOW
┌─────────────────────────────────────────────┐
│                                             │
│  ┌──────────┐                               │
│  │ Trigger  │                               │
│  └────┬─────┘                               │
│       │                                     │
│       ▼                                     │
│  ┌──────────────────────┐                  │
│  │ Execute Workflow     │                  │
│  │ Call: "Validate Data"│───────┐          │
│  └──────────────────────┘       │          │
│       │                          │          │
│       ▼                          │          │
│  ┌──────────┐                   │          │
│  │ Continue │                   │          │
│  └──────────┘                   │          │
│                                  │          │
└──────────────────────────────────┼──────────┘
                                   │
                                   │ Calls
                                   ▼
            SUB-WORKFLOW: "Validate Data"
            ┌──────────────────────────────┐
            │                              │
            │  ┌────────────┐              │
            │  │ Workflow   │              │
            │  │ Trigger    │              │
            │  └──────┬─────┘              │
            │         │                    │
            │         ▼                    │
            │  ┌────────────┐              │
            │  │ Check      │              │
            │  │ Required   │              │
            │  │ Fields     │              │
            │  └──────┬─────┘              │
            │         │                    │
            │         ▼                    │
            │  ┌────────────┐              │
            │  │ Validate   │              │
            │  │ Format     │              │
            │  └──────┬─────┘              │
            │         │                    │
            │         ▼                    │
            │  ┌────────────┐              │
            │  │ Return     │              │
            │  │ Result     │              │
            │  └────────────┘              │
            │                              │
            └──────────────────────────────┘
                      │
                Returns │
                      ▼
              Back to Main Workflow
Queue and Batch Processing
For high-volume workflows, understanding queues is important:
HIGH VOLUME SCENARIO
═══════════════════════════════════════

Incoming Data: 1000 items/minute
                │
                ▼
        ┌───────────────┐
        │  INPUT QUEUE  │
        │  📦📦📦📦📦   │
        │  📦📦📦📦📦   │
        │  📦📦📦📦📦   │
        └───────┬───────┘
                │
         Take 10 at a time
                │
                ▼
        ┌───────────────┐
        │  PROCESSING   │
        │  🔄🔄🔄🔄🔄   │
        │  Processing   │
        │  batch of 10  │
        └───────┬───────┘
                │
         Complete batch
                │
                ▼
        ┌───────────────┐
        │  OUTPUT       │
        │  ✅ Processed │
        │  ✅ Processed │
        │  ✅ Processed │
        └───────────────┘

Repeat until queue is empty
Memory and State in Workflows
Understanding how n8n handles data between executions:
STATELESS (Default)
════════════════════════════════════════
Execution 1         Execution 2
    │                   │
    ▼                   ▼
[Process]           [Process]
    │                   │
    ▼                   ▼
 [Done]              [Done]
    │                   │
No memory      No memory from
  saved         previous run

Each execution is independent
STATEFUL (Using External Storage)
════════════════════════════════════════
Execution 1
    │
    ▼
[Process] ─────→ [Save to Database]
    │                   │
    ▼                   │
 [Done]                 │
                        │
                   ┌────┴─────┐
                   │ Database │
                   │  State   │
                   └────┬─────┘
                        │
Execution 2             │
    │                   │
    ▼                   │
[Read Database] ←───────┘
    │
    ▼
[Process with Context]
    │
    ▼
[Update Database]

State persists between runs
Best Practices Visualization
❌ Poor Workflow Design
Messy, hard to maintain:
┌────┐→┌────┐
│ A  │ │ B  │→┌────┐
└────┘ └────┘ │ C  │→┌────┐
  ↓      ↑     └────┘ │ D  │
┌────┐  │       ↓     └────┘
│ E  │──┘     ┌────┐    ↓
└────┘        │ F  │  ┌────┐
               └────┘  │ G  │
                       └────┘

Problems:
• Connections cross each other
• No clear flow direction
• Hard to debug
• Difficult to understand
✅ Good Workflow Design
Clean, easy to maintain:
┌────┐  ┌────┐  ┌────┐  ┌────┐
│ A  │→ │ B  │→ │ C  │→ │ D  │
└────┘  └────┘  └────┘  └────┘
  ↓
┌────┐  ┌────┐  ┌────┐
│ E  │→ │ F  │→ │ G  │
└────┘  └────┘  └────┘

Benefits:
• Clear left-to-right flow
• Logical grouping
• Easy to follow
• Simple to debug
Conclusion
Understanding how n8n workflows function at a visual level transforms you from a user into a workflow architect. The patterns and concepts we’ve explored here form the foundation for creating powerful, efficient, and reliable automations.
Key takeaways to remember:
- Workflows are node chains where data flows and transforms
- Four node types serve distinct purposes: triggers start, actions do, logic decides, transforms modify
- Data flows sequentially unless you use parallel processing or conditional branching
- Patterns repeat across different use cases—learn the patterns, apply them everywhere
- Visual debugging makes troubleshooting faster and easier
- Clean design matters for maintainability and team collaboration
As you build more workflows, these visual mental models will become second nature. You’ll start seeing automation opportunities everywhere and know exactly how to construct the workflow to solve them.
The beauty of n8n is that once you understand these core concepts, there’s virtually no limit to what you can automate. From simple two-node workflows to complex multi-branch processes handling thousands of items, the principles remain the same.
Ready to master n8n workflows and stay updated with the latest automation techniques, visual guides, and expert tips? Bookmark ToolTechSavvy and revisit regularly for fresh tutorials, advanced workflow patterns, and practical automation strategies. We publish new visual guides and real-world examples weekly to help you become an n8n expert!